
Answering Machine Detection (AMD)
Answering Machine Detection frees up your Agents from leaving voicemails and allows you to leave a pre-recorded voicemail whenever an answering machine is detected.
When creating your campaign you will be given the option to enable AMD.
Note that in order to activate AMD you will need to contact your administrator and purchase your AMD licenses.
To view your current licenses, select 'Preferences' from the 'Settings' menu.
From the 'Preferences' menu choose 'Licenses'
Call Recordings
In order to meet PCIDSS Compliance, we have enhanced the call recording functionality to enable an Agent to 'mute' a recording while taking payment or other personal information.
While an Agent is on an active call, they will be offered the following call recording options:
Recording Options
- To start recording the call, click

- To stop recording the call, click

- To pause / mask the recording, click

- To leave a pre-recorded message, click

Dialling Hours
Cloud Dial supports the ability to customise the hours in which Cloud Dial will make calls.
From the 'Settings' menu on the left hand side, click 'Preferences'.
From the 'Preferences' menu choose 'Dialler Settings'
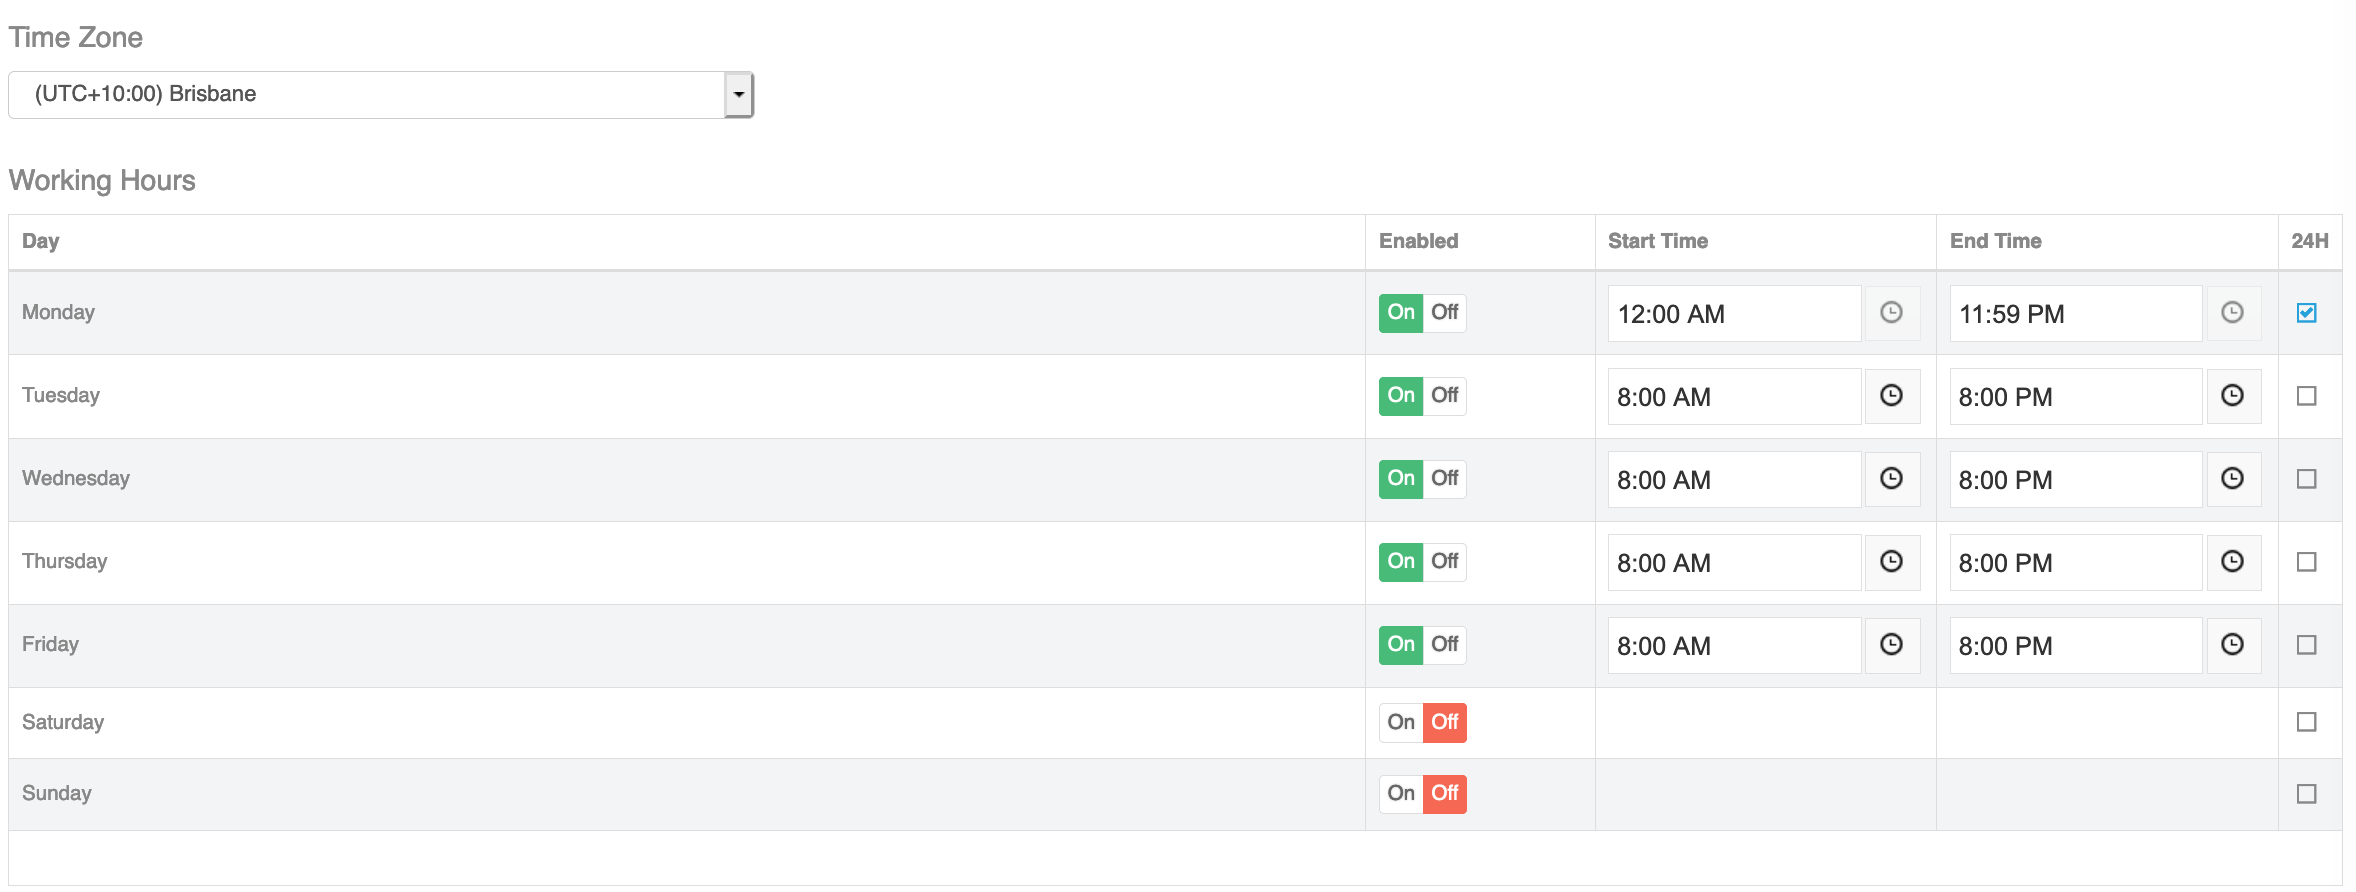
Specify the times you would like your campaigns to dial.
Click  to complete the configuration.
NOTE: This will affect all campaigns.
Firewall
When you first activate CloudDial you will be prompted to add your WAN IP Address to the CloudDial firewall. This firewall ensures that access is only granted from the IP Addresses that you authorize.
Adding additional IP addresses to the CloudDial firewall is a simple proceess that can be done by an existing administrator account.
From the 'Settings' menu, select 'Preferences'.

Select the 'Firewall' tab from along the top of the screen.
Enter the 'WAN IP Address' you wish to add and press 'Save' to save your changes.
Click 'Delete' to remove any unused IP Addresses.
Integrations
Cloud Dial Integrations come in two forms:
- ScreenPop: This type of integration will open a new tab in your web browser
- Webhook: This type of integration will send the requested data to a URL of your choice which can then act upon that data.
The process to add / edit integrations is outlined below.
From the 'Settings' menu, select 'Preferences'.
Select the 'Integrations' tab from along the top of the screen.

On this page, you can see both your active & disabled integrations.
- Click 'Edit' to modify an Integration.
- Click 'Disable' to temporarily disable an Integration.
Add New Integration
Click  to add a new Integration.
When adding new Integrations, there are four components:
Integration Details
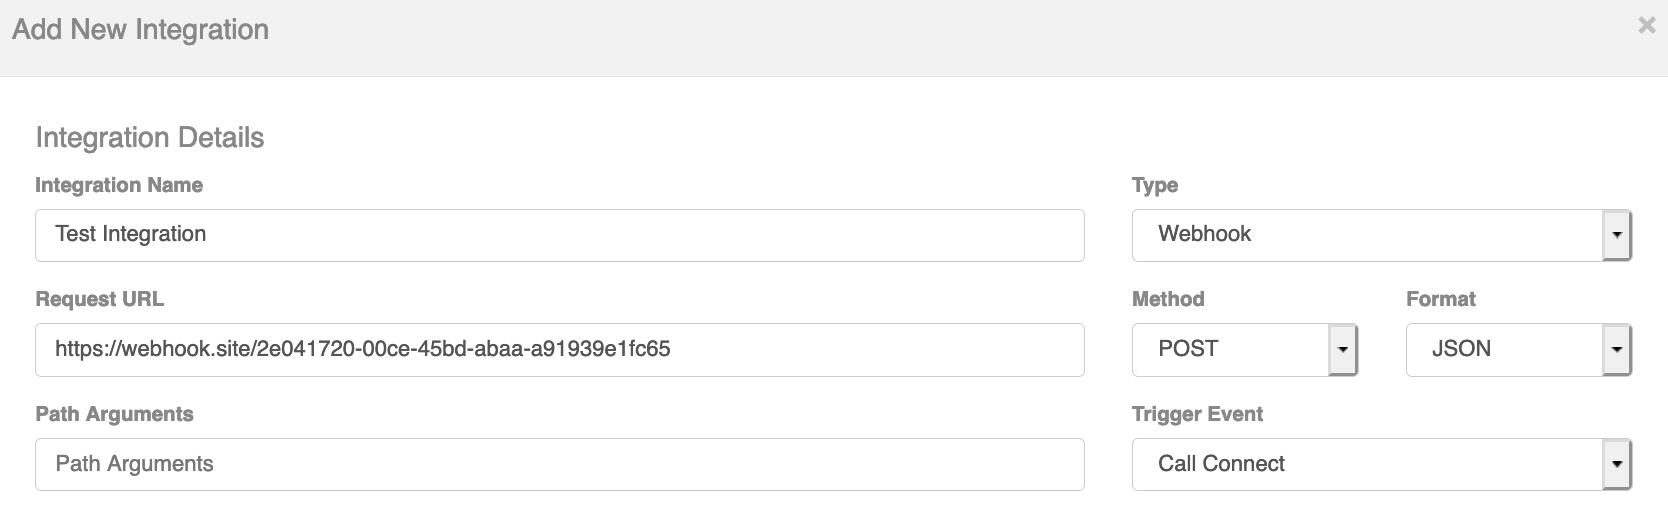
Integration Name: A descriptive name for your reference.
Type:
- ScreenPop: This type of integration will open a new tab in your web browser
- Webhook: This type of integration will send the requested data to a URL of your choice which can then act upon that data.
Request URL:
- When using 'ScreenPop', this is the URL that will open in a new tab.
- When using 'Webhook', this is the URL Cloud Dial will send the data to.
Method: Choose from 'GET' & 'POST'.
Fromat: Choose from 'QUERY' & 'JSON'.
Path Arguments: Enter any path arguments here.
Trigger Event: The Integration can trigger on either 'Call Connect', 'WrapUp', or 'AMD'.
Authentication

- Authentication Type: Choose from 'None', 'Basic Auth', and 'Token' based authentication.
- Username: Enter in as needed.
- Password: Enter in as needed.
- Token: Enter in as needed.
Header Values

Add the following details as needed.
- Request Name
- Request Value
To add additional header values, click the  button.
Field Values

Add the following details as needed.
Request Key
Request Value:
- Campaign Name
- Customer Reference
- Customer Name
- Date/Time
- Dial Result
- Dial Result Notes
- Phone Called
- Agent Name
- Wrap Up By
- Wrap Up Reason
When finished, click the  button.
Phone Numbers
Phone numbers need to be enabled specifically for Cloud Dial.
To do this, select 'Preferences' from the 'Settings' menu on the left hand side.
Select 'Phone Numbers' from the top menu.
On this screen you can enable / disable any phone numbers for use with Cloud Dial.
Use the 'Enable / Disable' slider to activate numbers on demand.
Predictive Dialing
The Power Factor is an important setting that controls how many calls Cloud Dial makes with consideration to the number of waiting (idle) agents and calls in the dialling state.
Example: A Power Factor of 2.0x means that if there were 10 idle agents, Cloud Dial would attempt to dial 20 calls.
The challenge for Call Center administrators has always been determining the correct power factor for each campaign.
A campaign with significant poor quality phone number data may mean a high power factor is required to keep Agents busy on calls, however, a campaign operating with high-quality call data would likely mean the opposite, a low Power Factor closer to 1:1 (calls to agents) would be advantageous.
Predictive Dialing automates the setting of a Power Factor replacing the need to set a specific value on each campaign. By enabling Predictive Dialing, Cloud Dial will automatically determine and adjust the required number of calls made to meet the needs of the call center.
To enable Predictive Dialling, configure the following parameters in Dialler Settings under Preferences.
Target maximum wait time (sec)
This value in seconds is the target maximum (acceptable) time in Idle (seconds waiting to receive a call) that the call centre is aiming to achieve.
Target maximum calls drop (%)
This value in % is the target maximum acceptable NoAgent %.
Tuning Strategy
Generous, Moderate and Aggressive tuning strategies determine how much change the Power Factor undergoes at each sampling period. An aggressive strategy will make a large change order to achieve less than the maximum target wait times within the target call drop %, a moderate or generous tuning strategy will make smaller adjustments to the power factor.
The Predictive dialler will continually adjust the Power Factor to keep within the call drop % whilst aiming to keep agent idle times within the maximum wait time in seconds.
We recommend Aggressive tuning where call data quality is consistent (such as customer loyalty campaigns) and moderate or generous when call data quality is unpredictable (such as debt collection applications).
Where call data is unpredictable an aggressive strategy may over tune the power factor, it is recommended that the Cloud Dial Manager observe the operation of a running campaign to review the appropriate strategy to use.
TIP: When a campaign is in predictive mode, the Cloud Dial administrator can override the current predictive value, this can be beneficial if the predictive algorithm is under or over performing or to move the Campaign towards an optimal busyness quickly.
Configuration
From the 'Settings' menu on the left hand side, click 'Preferences'.
From the 'Preferences' menu choose 'Dialler Settings'
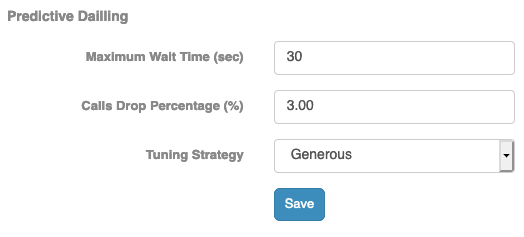
Enter the following settings:
Maximum Wait Time (sec): This is the maximum time you want for an agent to wait for a call.
Calls Drop Percentage (%): This is the maximum percentage of 'NoAgentDetected' calls you are prepared to accept.
Tuning Strategy: This affects how Cloud Dial will adjust the Power Factor. Choose from;
- Generous
- Moderate
- Aggressive
Enable on Campaign

When you create a campaign as per normal, instead of setting a specific Power Factor, tick 'Enable Predictive Dialling'.
Start the campaign as per normal.
Recorded Sounds & TTS
A recorded sound can be used in many scenarios with your campaigns, once they have been uploaded.
There are two main options when adding a new recording.
- Upload a file from your computer.
- Use Text-To-Speach (TTS) to dynamically generate a oneoff message.
- Use Text-To-Speach (TTS) to dynamically generate a custom message for each call. This can include specific reference numbers, contact information, etc, and provides a more personalised experience for the callee.
The process to add, edit, and preview recordings is outlined below.
From the 'Settings' menu, select 'Preferences'.
Select the 'Recorded Sounds & TTS' tab from along the top of the screen.

Here you can see all of your current recordings.
- Click the
 button to modify an existing recording.
 - Click the
 button to preview an existing recording.
 - Click the
 button to delete a recording.
 - Click the
 button to create a new recording.
Uploading a recording
From the 'Recorded Sounds & TTS' page, click the button to create a new recording.
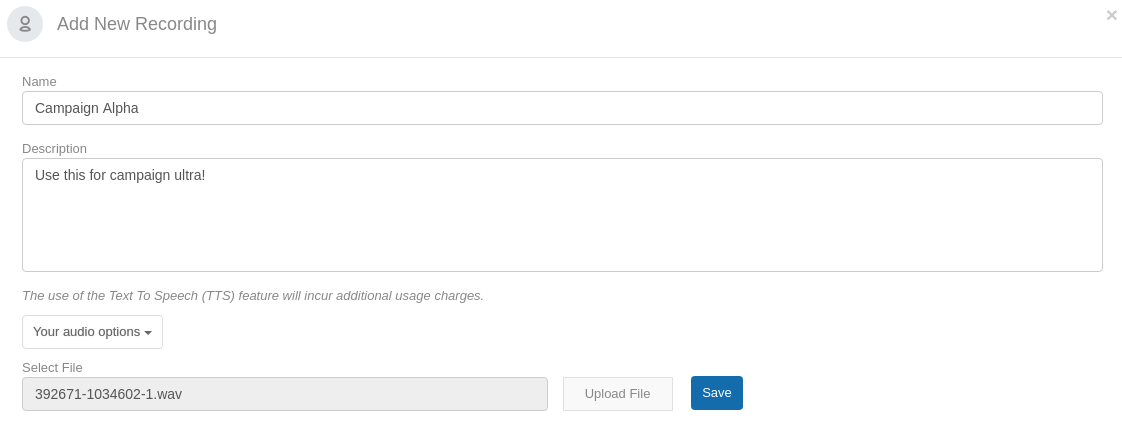
You will need to enter a 'Name' and a 'Description' for the recording. This is for your reference and it is recommended to be descriptive as this will help the campaign managers work out which file to use when creating campaigns.
From the drop down box, select 'Upload my audio file'.
Click the 'Upload File' button and locate the .wav formatted file on your computer.
NOTE: Supported file types are .wav only.
When finished, click the  button to save the recording.
You can now use this in a new campaign.
Generate a One-off Text-To-Speach (TTS) Recording
From the 'Recorded Sounds & TTS' page, click the button to create a new recording.
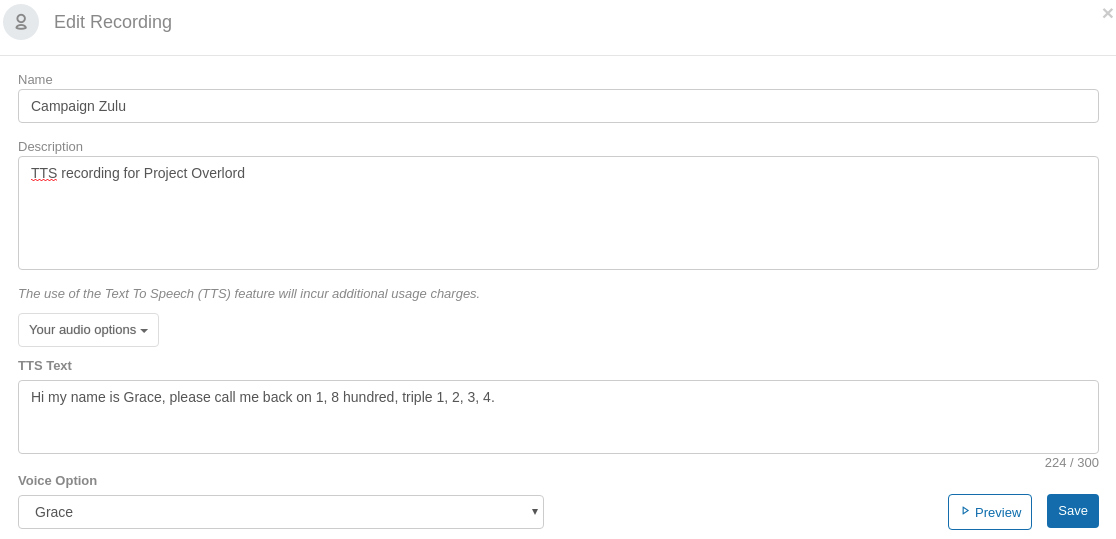
You will need to enter a 'Name' and a 'Description' for the recording. This is for your reference and it is recommended to be descriptive as this will help the campaign managers work out which file to use when creating campaigns.
From the drop down box, select 'Use Text To Speach to pre-generate my audio file'
Note: This option will generate the recording once, and the same file will be used for each call.
In the 'TTS Text' box, enter in the text you want to use.
From the 'Voice Option' select your preferred voice.
Use the  button to listen to the recording.
Pro Tip: Your phone number can sound more natural using a combination of text and commas.
Eg: For the 1800-111-234 number you can write "1, 8 hundred, triple 1, 2, 3, 4."
When finished, click the button to save the recording.
You can now use this in a new campaign.
Generate a Dynamic Text-To-Speach (TTS) Recording
From the 'Recorded Sounds & TTS' page, click the button to create a new recording
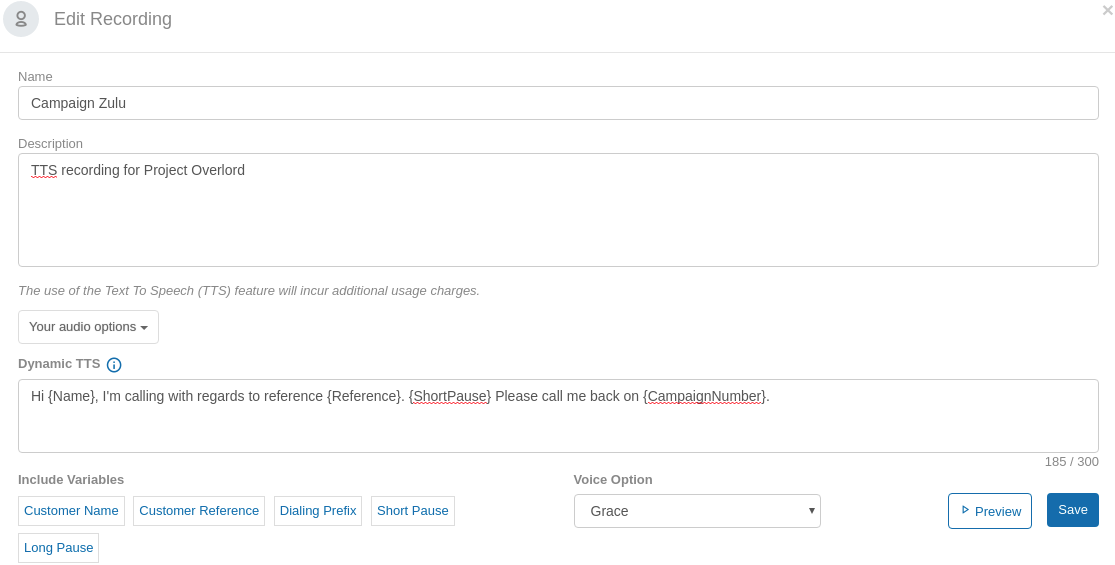
You will need to enter a 'Name' and a 'Description' for the recording. This is for your reference and it is recommended to be descriptive as this will help the campaign managers work out which file to use when creating campaigns.
From the drop down box, select 'Use Dynamic Text To Speech with custom variables'.
Note: This option will dynamically generate the recording every time it is used. Substituting the variables selected.
In the 'TTS Text' box, enter the text you want to use. Substitute the following variables as required.
Customer Name: This will substitute the 'name' of the contact.
Customer Reference: This will substitute the reference number of the contact.
Dialling Prefix: This will subsitute the outbound caller ID used for the campaign.
Short Pause: This will add a short pause to the recording at this location.
Long Pause: This will add a slightly longer pause to the recording at this location.
From the 'Voice Option' select your preferred voice.
Use the button to listen to the recording.
Pro Tip: Your phone number can sound more natural using a combination of text and commas.
Eg: For the 1800-111-234 number you can write "1, 8 hundred, triple 1, 2, 3, 4."
When finished, click the button to save the recording.
You can now use this in a new campaign.
Wrap Up Reasons
A Wrap Up reason allows the agent to click a single button when ending the call to signify the outcome of the call for easy reporting.
You can assign your Wrap Up reasons to a category. This means when creating a campaign, you can add all the Wrap Up reasons in a category with a single click.
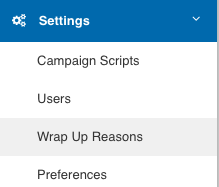
From the 'Settings' menu, click 'Wrap Up Reasons'.
Here you can edit your Wrap Up reasons.
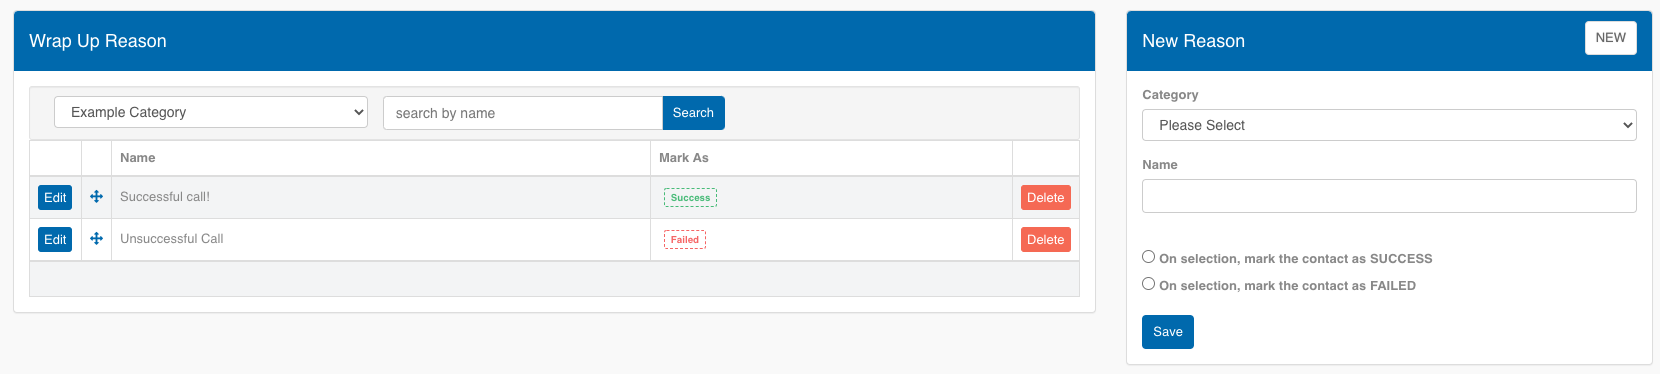
The page is laid out into two distinct areas.
- The left hand side is dedicated to existing Wrap Up reasons.
- The right hand side is dedicated to the creation of new Wrap Up reasons.
New Wrap Up Reasons
Click 'NEW' to create a new Wrap Up reason.
Choose the category from the dropdown menu.
Click 'Edit' to adjust as needed.
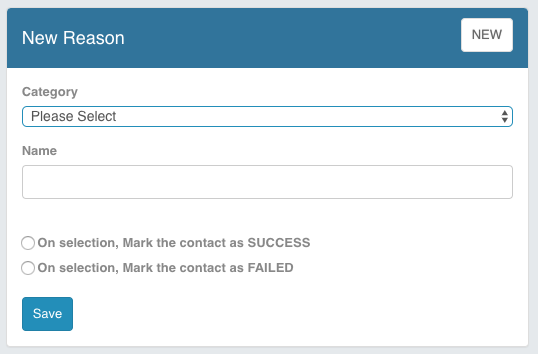
Here you will be able to edit or create a new Wrap Up reason.
From the 'Category' dropdown menu, you can either select an existing category to add to, or create a new category.
Give you Wrap Up reason a descriptive name (This will be what the Agents will see).
Choose between 'success' or 'failed'.
Click 'Save when finished.
Edit existing Wrap Up Reasons
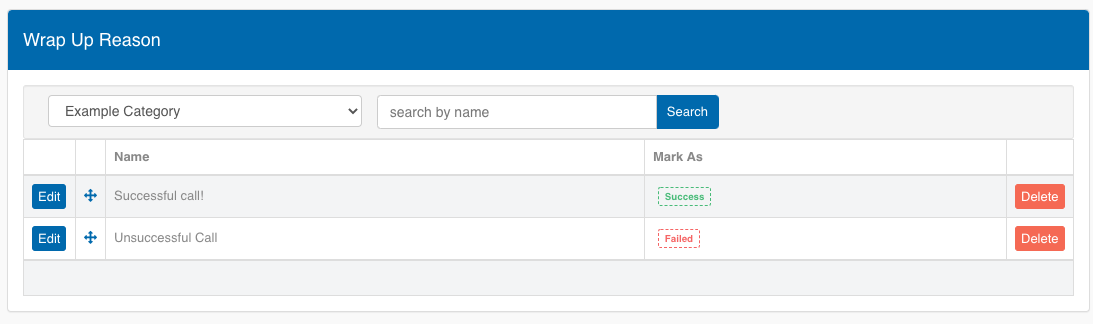
Use the dropdown to select the category, then use the searchbox to filter the results as needed.
To edit an existing Wrap Up reason, click 'Edit'.
When you have made your changes, click 'Save'.