
Agents
As a manager, keeping an eye on your running Campaigns and agents is critical.
You can do so easily from the Agents page.
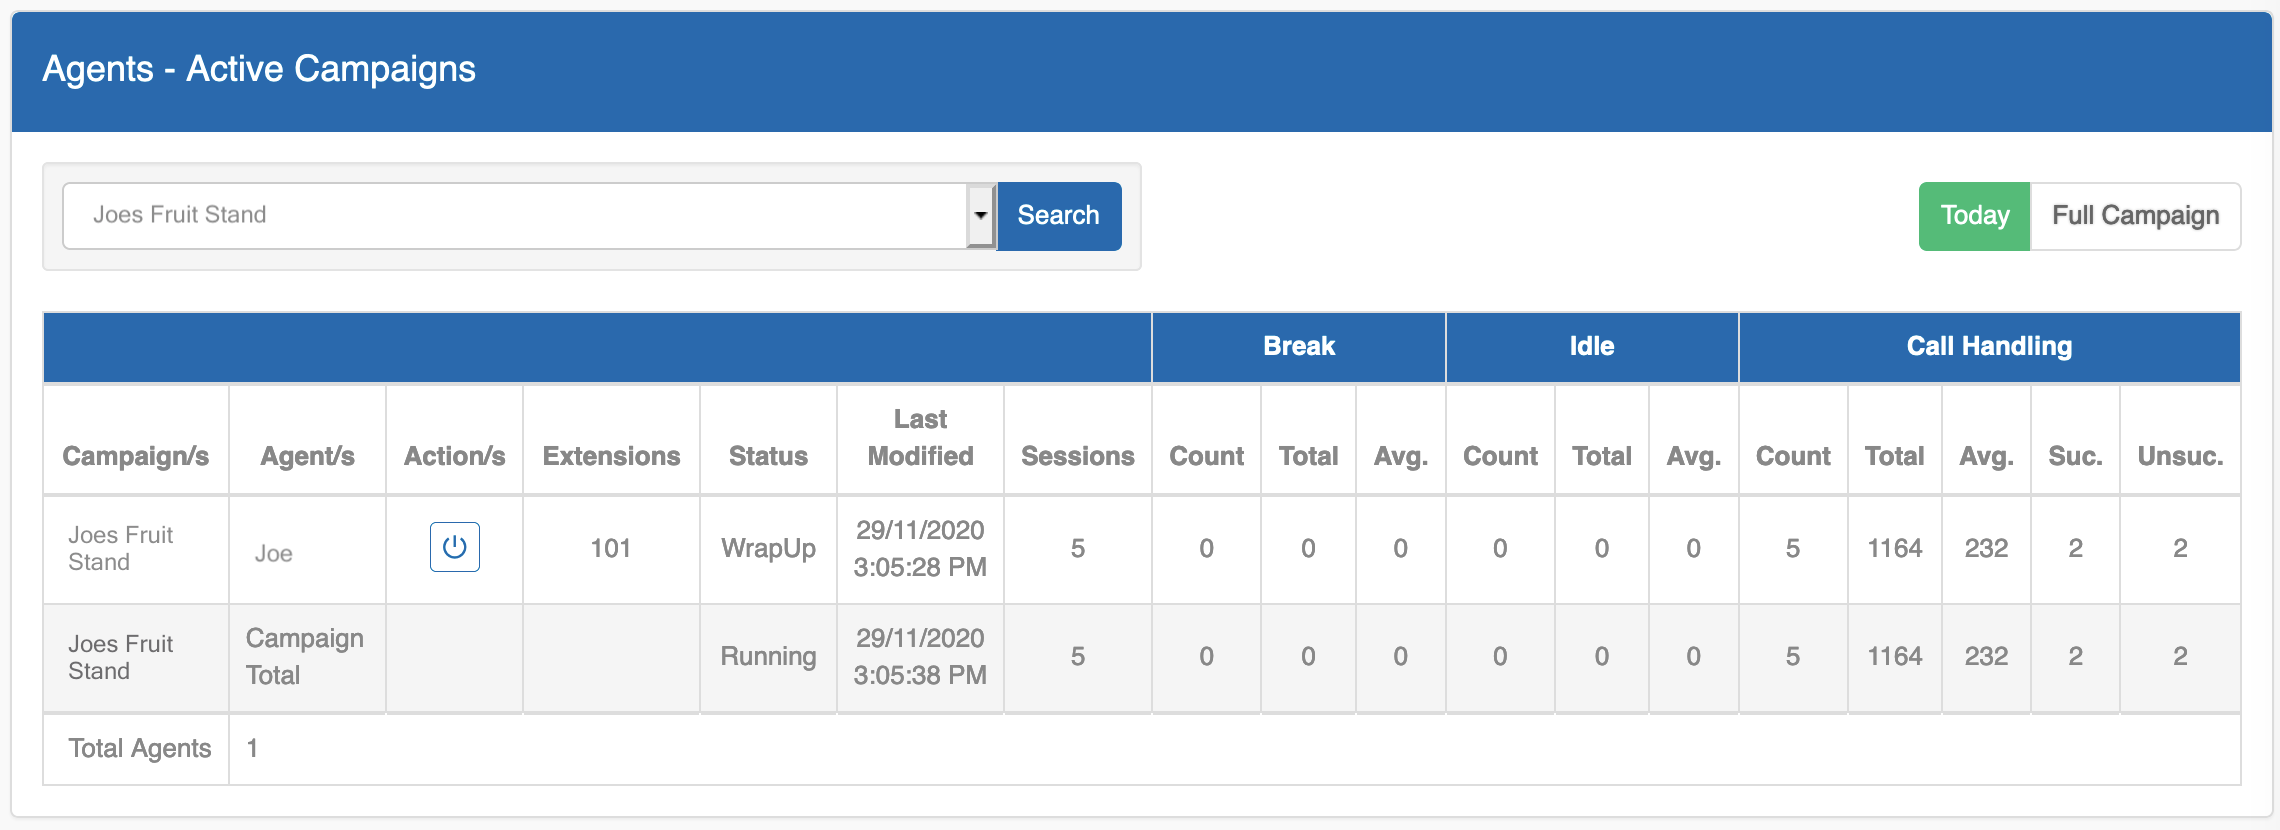
On this page you can view Agent performance across Campaigns.
- Use the drop-down field to select or search for a specific Campaign.
- On the top right-hand side you can choose between viewing data from today only or for a Full Campaign.
The column headings provide valuable information to the Manager.
Campaign/s: The name of the Campaign.
Agent/s: The Agents name, or the Campaign Total.
Action/s: Click the
 button to log the Agent out of Cloud Dial.
Extensions: The Agents extension number.
Status: The Agents current status.
Last Modified: The last modified date/time.
Sessions: The total number of sessions for the user (how many times that user has joined the Campaign).
Break: During this time the Agent will not receive any calls. There are three metrics in the category:
- Count: How many times the Agent entered 'Break' status.
- Total: Total time (in seconds) the Agent spent in 'Break' status.
- Avg: The average time (in seconds) the Agent spent in 'Break' status.
Idle: During this time the Agent is waiting for the next call. There are three metrics in the category:
- Count: How many times the Agent entered 'Idle' status.
- Total: Total time (in seconds) the Agent spent in 'Idle' status.
- Avg: The average time (in seconds) the Agent spent in 'Idle' status.
Call Handling: During this time the Agent is either talking on a call, or completing a call. There are 5 metrics in the category:
- Count: Total number of calls the Agent has made/taken.
- Total: Total time (in seconds) the Agent spent on calls.
- Avg: The average time (in seconds) the Agent spent on calls.
- Suc: Total number of calls completed using a 'successful wrapup metric'.
- Unsuc: Total number of calls completed using an 'unsuccessful wrapup metric'.
Campaigns
There are two campaign types:
- General Campaigns.
- Virtual Agent Campaigns.
General Campaigns
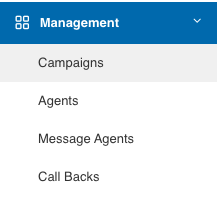
From the Management menu on the left hand side of the screen, select 'Campaigns'.

On this screen, you can see in the top section, all 'General Campaigns' that you have created.
For each Campaign you can perform the following actions.
- To start the Campaign, click

- To stop the Campaign, click

- To pause the Campaign, click

- To edit the Campaign, click

- To view statistics about the Campaign, click

- To adjust the Power Factor (opens new window) of the Campaign, click

- Answering Machine Detection, AMD (opens new window), can be toggled on and off, by using the
 and
and  buttons.
The column headings provide valuable information to the Campaign Manager.
Name: The name of the Campaign provided upon creation.
Direction: The direction of the Campaign.
- Outbound: Used for Campaigns where no return call is expected.
- Inbound: Used for Campaigns where only inbound calls are required.
- Blended: Used for Campaigns where both inbound and outbound calls are required.
Status: Shows the current status of the campaign.
Agents: The number of Agents currently signed into the Campaign.
Contacts: The number of contacts uploaded as part of the campaign.
Remain: The number of contacts that remain to be dialled.
Callbacks: The number of callbacks registered for the Campaign so far.
Progress: Campaign progression as a percentage.
Caller ID: The outbound caller ID that will be presented for the Campaign.
Power Factor: The Power Factor (opens new window) can be adjusted by using the arrows.
AMD: Adjust your AMD (opens new window) settings by clicking the on / off button.
Avg. Wait: The average time (in seconds) an Agent is waiting between calls, once entering 'Ready State'.
Avg. Call: The average duration (in seconds) of each call.
Avg. Wrap Up: The average time (in seconds) an Agent is taking to wrapup each call.
Drop Calls: The number of calls that were not servicable by Agents. This can indicate a high Power Factor (opens new window).
Created: Shows the Date, Time, and the Manager who created the Campaign.
Create a new General Campaign

To start a new campaign, click 'New Campaign'.
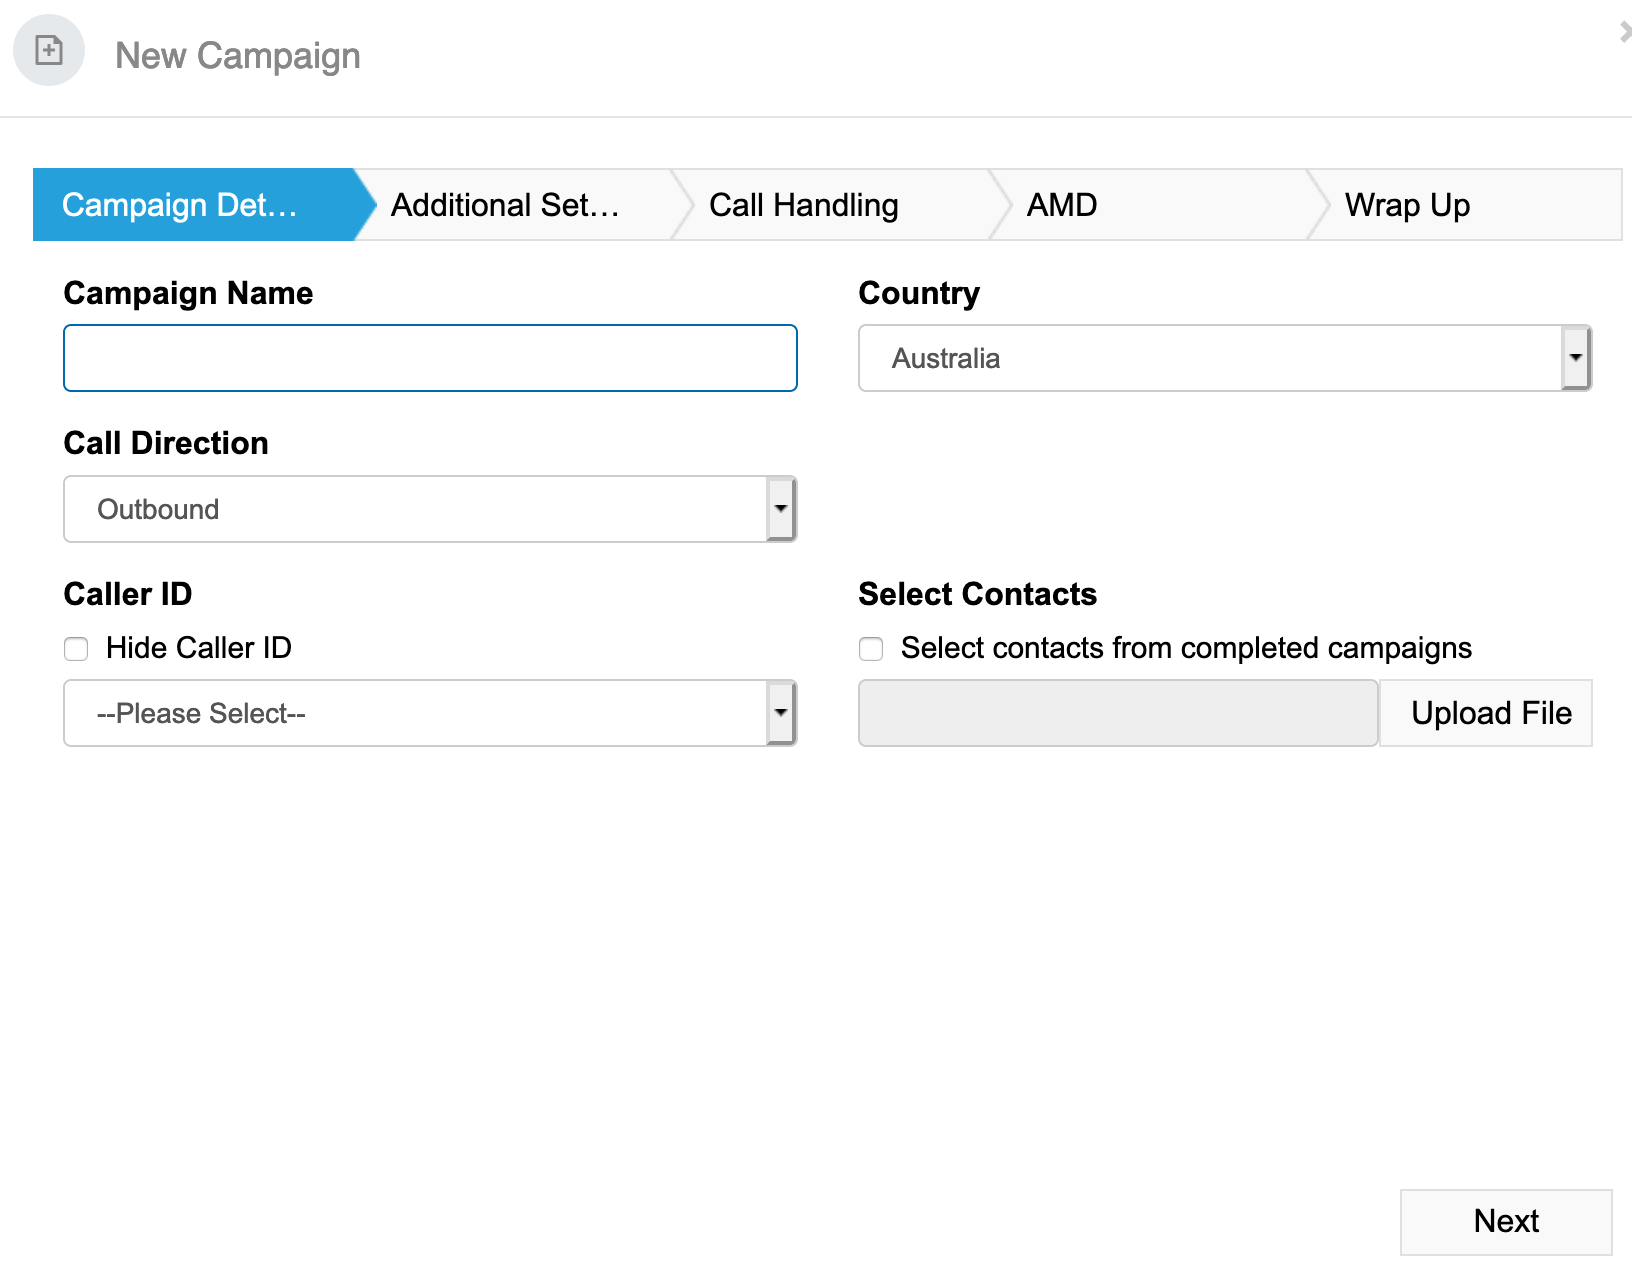
Enter the following information:
Campaign Name: This name is for your reference.
Country: Choose between Australia & New Zealand.
Direction: The direction of the Campaign.
- Outbound: Used for Campaigns where no return call is expected.
- Inbound: Used for Campaigns where only inbound calls are required.
- Blended: Used for Campaigns where both inbound and outbound calls are required.
Caller ID: Choose a number to be used for outbound caller ID. (You can also tick the checkbox if you wish to send private caller ID).
Select Contacts: There are two ways to select contacts for your Campaign.
- Click the 'Upload File' button, to upload a contact list.
- Tick the 'Select contacts from completed campaigns' option.
Click Next when ready to proceed.
Optional Step: Selecting Contacts From Previous Campaigns.

This page will only be visible if you tick the 'Select contacts from completed campaigns' option.
Here you can search by name for specific Campaigns within the last 7 to 30 days.
Select as many Campaigns in the left column.
Once you select a Campaign in the left column, you will then be able to select different WrapUp Reasons in the right-hand column.
You can also 'Include contacts that were not previously dialled' by ticket the checkbox.
Click Next when ready to proceed.

Enter the following information:
Starting Power Factor: The starting Power Factor (opens new window) can be anywhere from 1.0 to 8.0.
Enable Predictive Dialling: Tick this option to enable predictive dialling.
Redial Attempts: The number of times you wish to attempt to reach each contact.
Campaign Script: Choose from the list of user-created Campaign Scripts.
Integrations:
- Integration Name: Choose from the list of user-created Integrations.
- Trigger Event: Choose from 'Call Connect', 'WrapUp', and 'AMD'.
Notes: Notes entered here will be displayed for all Agents to read while waiting on a call.
Allow Agents to enter Notes: Tick this option if you want Agents to be allowed to enter notes.
Click Next when ready to proceed.
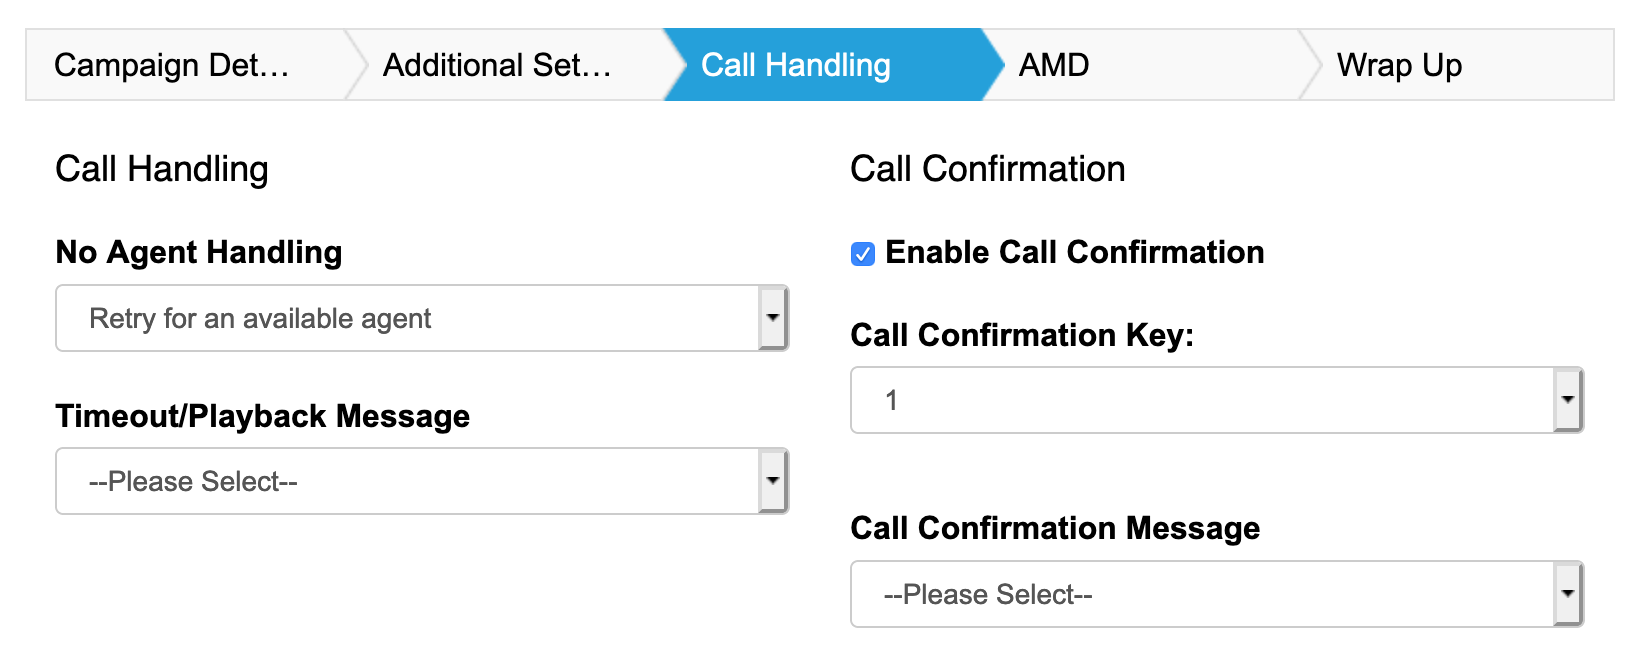
Call Handling is separated into two areas.
- No Agent Handling: What to do if there is no Agent available to take the call.
- Call Confirmation: Request the contact to press a button to accept the call.
Enter the following information:
No Agent Handling: Choose from any of the following:
- Hang Up
- Retry for an available Agent: Cloud Dial will wait 15 seconds for an Agent. If no Agent is available after 15 seconds, Cloud Dial will play the 'Timeout Message'.
- Play Message and Hang Up: Plays message then hangs up.
Use the drop-down box to select a Timeout/Playback Message.
Tick the checkbox if you wish to make use of the 'Call Confirmation' feature.
- Call Confirmation Key: This is the key that will need to be pressed to accept the call.
- Call Confirmation Message: This is the message that will be played to the contact. This message should prompt them to press the 'Call Confirmation Key' to accept the call.
Click Next when ready to proceed.
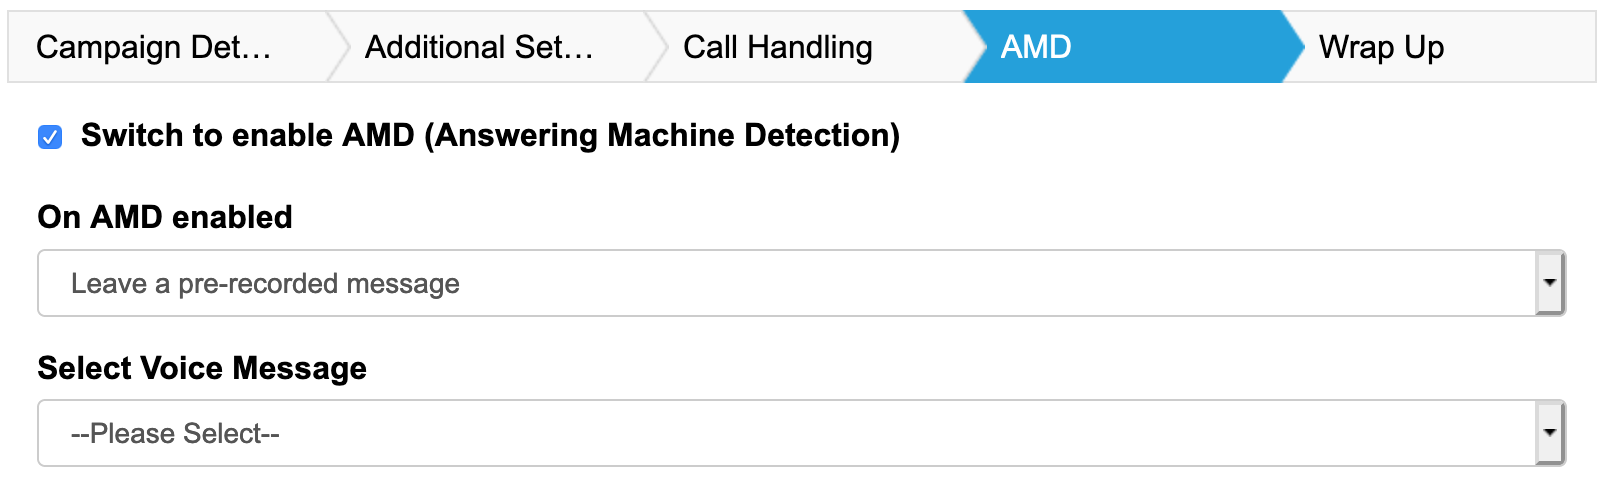
If you wish to make use of AMD (opens new window) for this Campaign, tick the checkbox.
You will need to specify what to do in the even an answering machine is detected.
Choose from:
- Hangup
- Leave a pre-recorded message.
Click Next when ready to proceed.
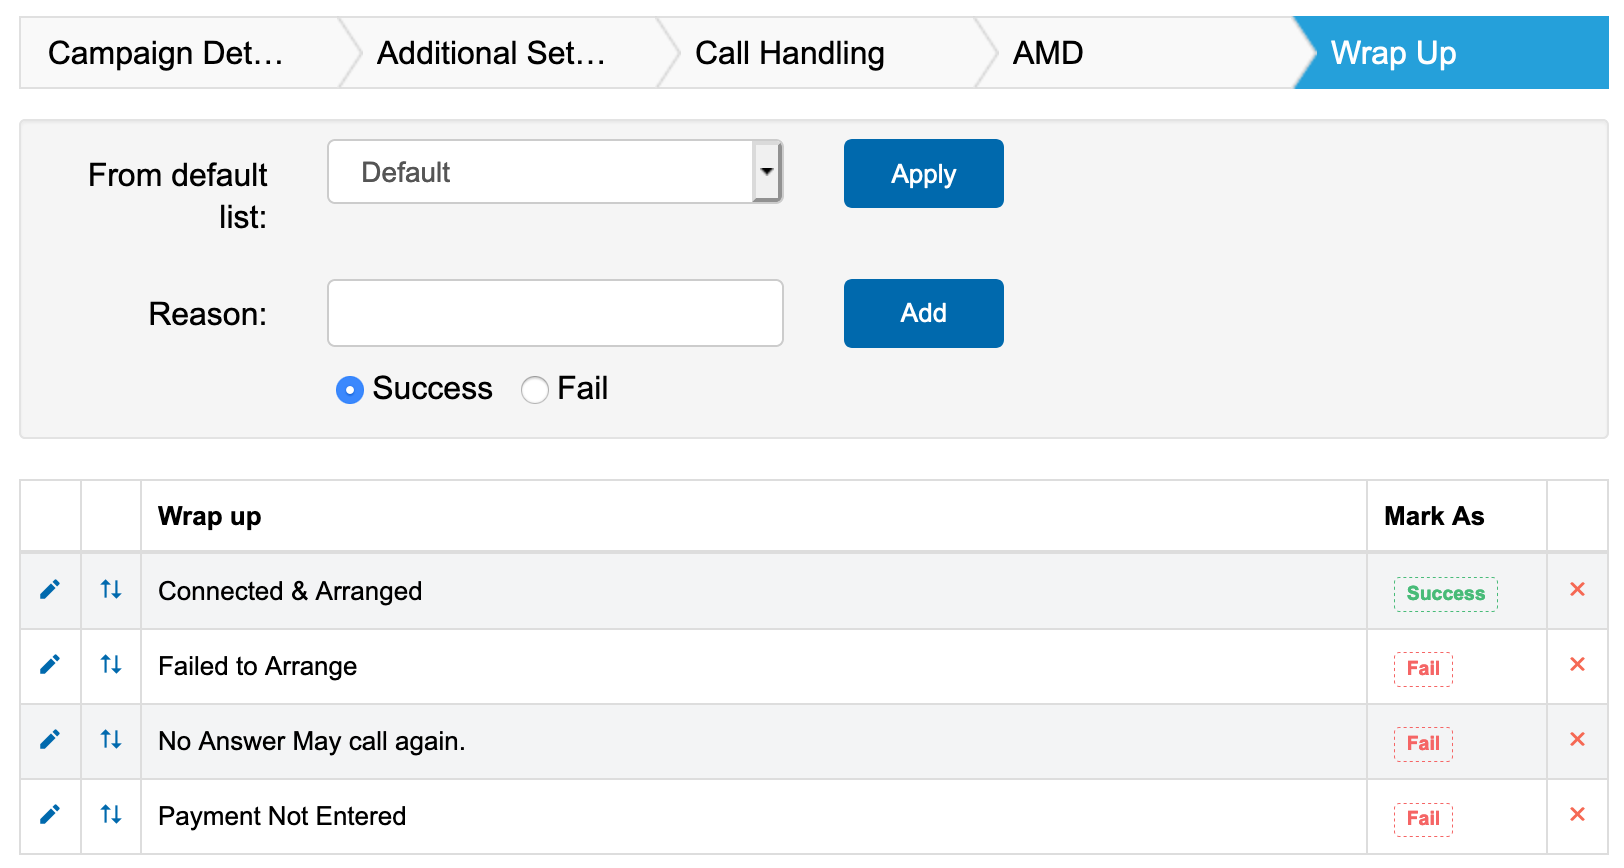
The final step to creating a Campaign, is the choose your WrapUp Reasons.
Use the drop-down box to either select from a user-defined default list of WrapUp reasons, or add your own as you see fit for the campaign.
Click Finish when you are ready to complete the setup for the Campaign.
General Campaign Template Headings
You MUST have the following column data in your Contact File at minimum. You can add as many other column headings as you require.
- Name
- Reference
- Phone1
Optional: Use the 'LoadSeq' column heading to customise the dialing order for your Campaign.
Virtual Agent Campaigns
A 'Virtual Agent Campaign' is a fully automated outbound campaign with no user agents involved.
This campaign will make outbound calls and play an automated message.
Call Flow
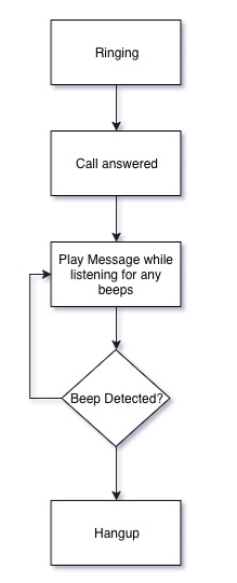
Call flow
1. Outbound call is placed.
2. Call is answered.
3. Automated Message is played (Cloud Dial beep detection continues to run).
4. If at any time a beep is detected, Cloud Dial will begin to play the automated message from the start.
5. Once the message has been played to completion, Cloud Dial will hangup.
Virtual Agent Template Headings
You MUST have the following column headings in your Contact File. If you do not require the additional phone numbers, leave the column blank.
- Name
- Reference
- Phone1
- Phone2
- Phone3
- Phone4
- State
Creating a Virtual Agent Campaign
From the Management menu on the left hand side of the screen, select 'Campaigns'.
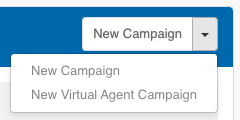
From the 'New Campaign' menu in the top right hand corner, select 'New Virtual Agent Campaign'.

Enter the following information:
- Campaign Name: This name is for your reference.
- Country: Select either Australia or New Zealand.
- Virtual Agents: This is the number of simultaneous calls that will be made.
- Contacts: Click the 'Upload File' button to select and upload your contact information.
- Redial Attempts: The number of times Cloud Dial will attempt to reach the contact. EG: If you select redial attempts = 2, and you have uploaded two numbers for a contact, Cloud Dial will dial each number once only for a total of two times.
- Sound Recording: Select from the dropdown list of previously uploaded recordings. Use the play / pause buttons to preview the file.
- Caller ID: Select from the dropdown list which number will be used as the outgoing number for this campaign. If you wish to use a private number, select 'Hide Caller ID', however you will still need to specify a phone number - This is a network requirement and will not be displayed on the remote phone.
- New Sound Recording: If you can not locate a suitable recording in the above section, you can upload a sound file directly from this page. Enter a name for the file, then click 'Upload File'.
Once you are happy with all settings for the campaign, click 'Finish'.
View running Virtual Agent Campaigns
From the Management menu on the left hand side of the screen, select 'Campaigns'.
On this screen, you can see any 'Virtual Agent Campaigns' that you have created below the 'General Campaigns.

Note that when you create the new campaign, the status will be 'NEW' and the campaign is not started, allowing you to create the campaign in advance, and start it when you are ready to begin.
For each Campaign you can perform the following actions.
- To start the Virtual Agent Campaign, click
- To stop the Virtual Agent Campaign, click
- To pause the Virtual Agent Campaign, click
- To edit the Virtual Agent Campaign, click
The column headings provide valuable information to the Campaign Manager.
- Name: The name of the Campaign provided upon creation.
- Status: Shows the current status of the campaign.
- Contacts: The number of contacts uploaded as part of the campaign.
- Remain: The number of contacts that remain to be dialled.
- Progress: Campaign progression as a percentage.
- Caller ID: The outbound caller ID that will be presented for the Campaign.
- Created: Shows the Date, Time, and the Manager who created the Campaign.
Ending a Campaign
From the Management menu on the left hand side of the screen, select 'Campaigns'.
To stop a Campaign, click the button.
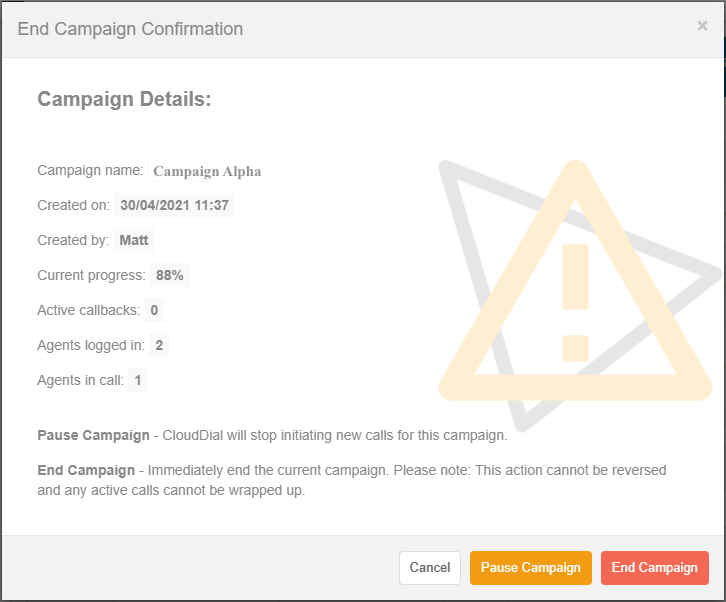
Here you can see the following information:
- Campaign name: The designated name for the campaign. Confirm this is correct before proceeding
- Created on: This is the date the campaign was created.
- Created by: The manager who created the campaign.
- Current progress: The current progress of the campaign.
- Active callbacks: Total number of callbacks that have yet to be actioned for the campaign.
- Agents logged in: Total number of agents currently logged into the campaign.
- Agents in call: Total number of agents on active calls.
Note: The statistics shown on the page are current as of when you load the page.
Clicking 'Pause Campaign' will pause the campaign. Cloud Dial will stop initiating new calls allowing your agents to complete the work. Once all work has been completed, and all calls have been wrapped up, click the 'End Campaign' button.
Clicking the 'End Campaign' button is instant and can not be reversed. Once the campaign is ended, no further calls can be wrapped up.
Message Agents
From the Management menu on the left hand side of the screen, select 'Message Agents'.

Here you can see all of your previous messages that have been sent to Agents.
To send a new message, click 'New Message'.
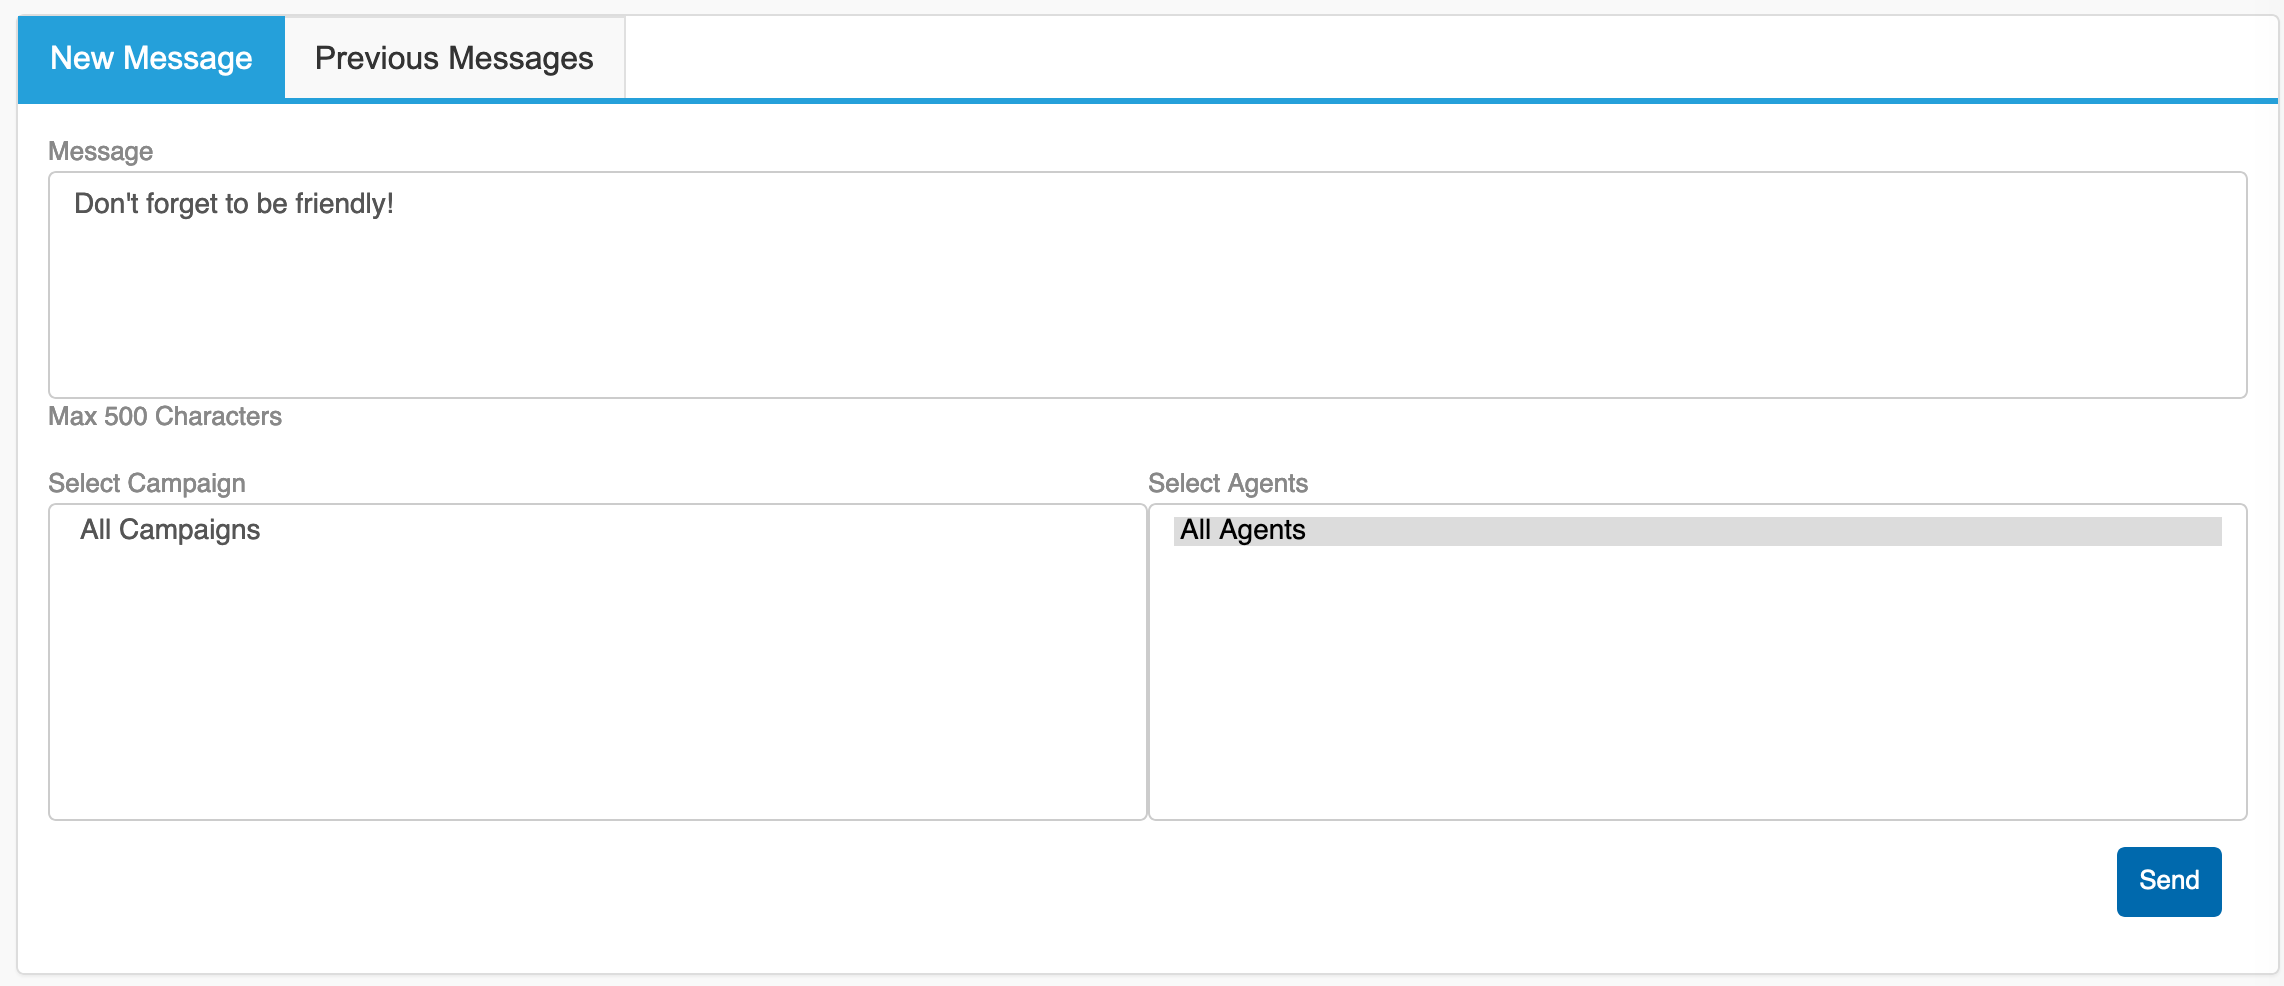
Enter the following:
- Message: This is the message that will be displayed to the Agents.
- Select Campaign: From the menu, select the Campaign/s that you wish to message.
- Select Agents: Choose which Agents should receive the message.
When you are ready to send the message, click 
Dial Queue
The Cloud Dial 'Dial Queue' page is a useful tool to monitor the status of the numbers.
Select a campaign from the drop-down list and press 'Refresh'.
You can also search for a specific name or phone number using the search button.
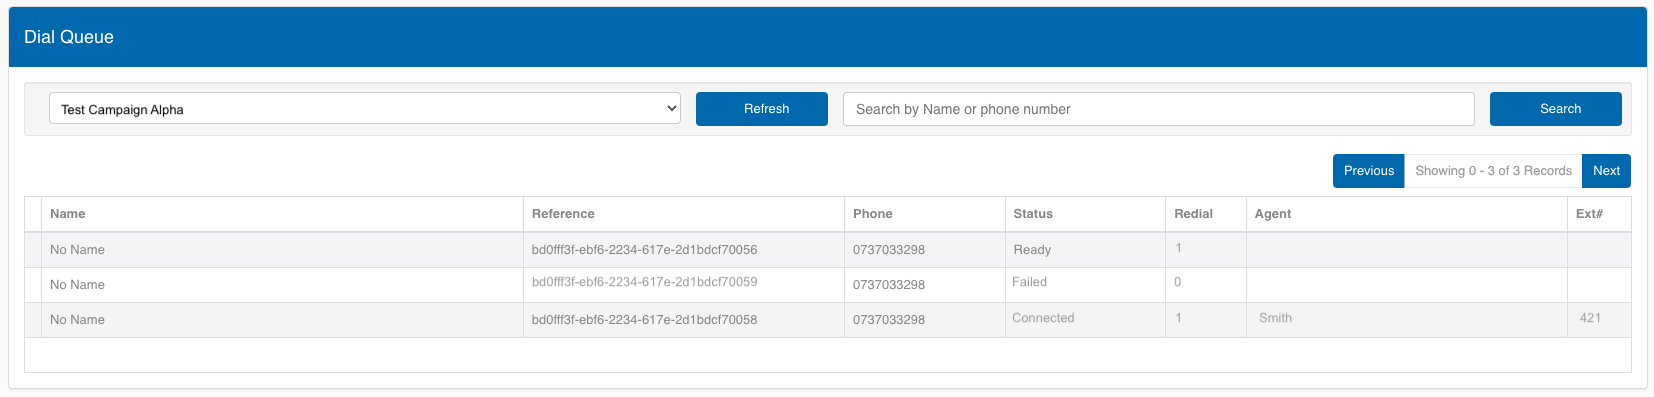
You will then see the. following column headings:
Name: The name allocated to the contact before the campaign was uploaded.
Reference: The reference allocated to the contact before the campaign was uploaded.
Phone: The phone number to dial for the contact. Note that if you have more than one number allocated to a contact, the contact will show multiple times in this list.
Status: Possible status for the number include:
Ready: This indicates the number is waiting to be dialled.
Note: If the retry attempts have been exceeded already, Cloud Dial will not attempt to dial the number.
Failed: This indicates the attempt failed outright and will not be retried.
Connected: A connected call.
Dialling: Cloud Dial is currently dialling the number.
HardFailure: Public Telephone Network indicated that this number is out of service.
InCall: This number is currently incall.
Paired: This number is one of multiple numbers for a contact. One of the other numbers was successful, so there is no need to dial this number.
Removed: This number was removed from the queue and will not be dialled.
Redial: This column indicates the number of failed attempts to reach the number.
Note: If you have a campaign with 1 'redial attempt' configured, Cloud Dial will dial a maximum of 2 calls for each phone number assigned to the contact.
Note: Once a call has been made, Cloud Dial will not attempt to dial the number again for a minimum of 5 minutes.
Agent: If the call was connected, this will show the agent who spoke on the call.
Ext: If the call was connected, this will show the extension number of the agent who spoke on the call.